Installing a new air conditioner is a big project, but it should not feel confusing. A good HVAC company will walk you through the process, explain your options, protect your home during the work, and test the system before they leave.
This guide explains what typically happens before, during, and after air conditioning installation so you know what to expect and what questions to ask.
Why Air Conditioning Installation Matters
A new air conditioner is not just another appliance. It is part of a larger cooling system that includes the outdoor condenser, indoor coil or air handler, refrigerant lines, electrical connections, thermostat, ductwork, airflow, and drainage.
When the system is installed correctly, your home should feel more comfortable, your cooling should be more consistent, and the equipment should run more efficiently. When it is installed poorly, you may end up with hot rooms, high energy bills, short cycling, refrigerant problems, water leaks, or early equipment failure.
That is why air conditioning installation should be handled by a licensed HVAC professional, not treated as a basic swap-out.
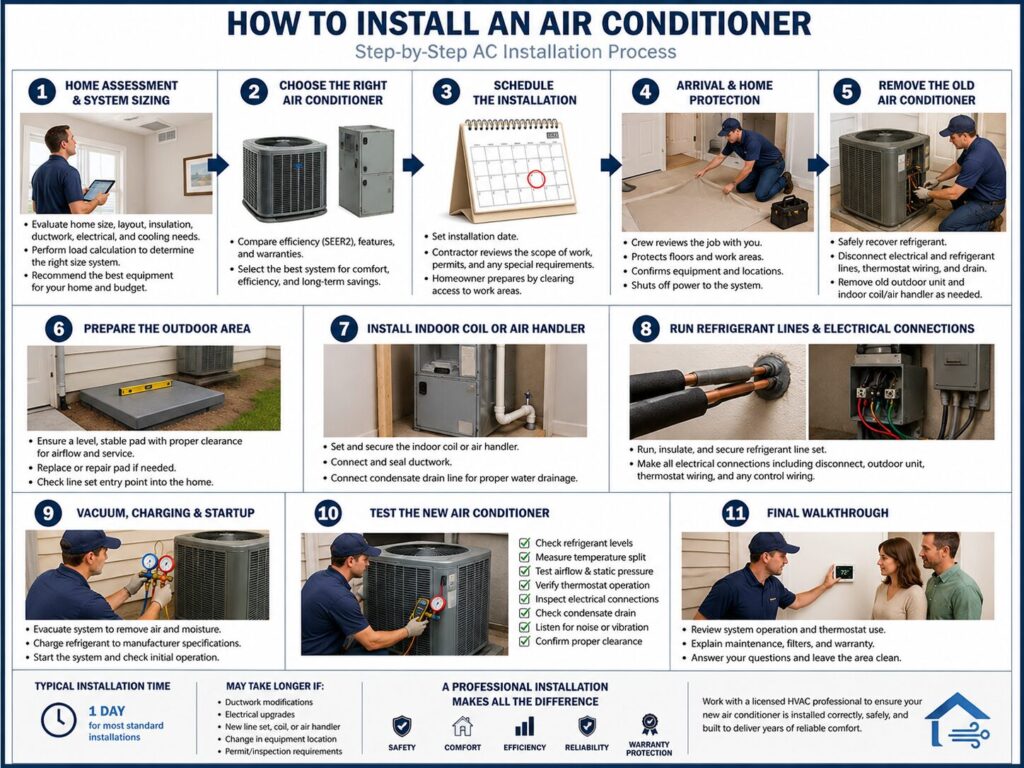
Step 1: Home Assessment and System Sizing
Before installation day, an HVAC technician should evaluate your home and existing cooling system. This is where the company gathers the details needed to recommend the right equipment and plan the job correctly.
The technician may look at:
- The size and layout of your home
- The age and condition of your current AC system
- Existing ductwork
- Insulation and airflow issues
- Electrical capacity
- Thermostat setup
- Indoor coil or air handler condition
- Outdoor unit location
- Drainage and condensate lines
- Comfort concerns, such as hot rooms or uneven cooling
Proper sizing is one of the most important parts of the process. A system that is too small may run constantly and struggle to cool the home. A system that is too large may turn on and off too quickly, leaving the home uncomfortable and humid.
The goal is to install an air conditioner that matches the home, not just replace the old unit with the same size automatically.
Step 2: Choosing the Right Air Conditioner
Once the home is evaluated, your HVAC contractor should explain your equipment options. Most homeowners will compare systems based on efficiency, comfort features, warranty, budget, and long-term operating cost.
You may hear terms like:
- SEER2 efficiency rating
- Single-stage cooling
- Two-stage cooling
- Variable-speed cooling
- Smart thermostat compatibility
- Central air conditioning
- Heat pump options
- Ductless mini-split options
You do not need to become an HVAC expert to make the right decision. A good contractor should explain the differences clearly and help you choose a system that fits your home and budget.
Step 3: Scheduling the Installation
After you approve the estimate, the installation is scheduled. Many standard air conditioning replacements can be completed in one day, but some projects take longer.
Installation may take more time if your home needs:
- Ductwork repairs or modifications
- Electrical upgrades
- A new thermostat
- A new indoor coil or air handler
- A new refrigerant line set
- Permit or inspection coordination
- A relocated outdoor unit
- Accessibility work in an attic, closet, crawl space, or tight mechanical area
Before installation day, ask what you need to do to prepare. In most cases, you will want to clear access around the indoor equipment, outdoor unit, electrical panel, thermostat, and work areas.
Step 4: Arrival and Home Protection
On installation day, the crew should review the job with you before getting started. This is the time to confirm the equipment being installed, the work areas, the thermostat location, and any special instructions.
The team may also set up floor protection, drop cloths, and worksite materials to help protect your home.
Before removing the old system, the technician will shut off power to the equipment and follow safety procedures. If the system uses refrigerant, it must be handled properly by certified professionals.
Step 5: Removing the Old Air Conditioner
If this is a replacement, the old outdoor condenser will be disconnected and removed. The technician will also remove or disconnect related components as needed, such as the indoor coil, refrigerant lines, electrical whip, disconnect box, or thermostat wiring.
Refrigerant must be recovered safely. It should not be released into the air. This is one reason central air conditioning installation is not a DIY job.
Depending on the condition of the existing system, the contractor may recommend replacing the refrigerant line set, indoor evaporator coil, drain components, or electrical disconnect. These pieces all affect the performance and safety of the new system.
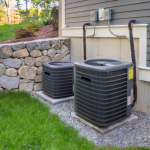
Step 6: Preparing the Outdoor Area
The outdoor condenser needs a stable, level surface with enough clearance for airflow and service access. If the old pad is uneven, sinking, damaged, or too small for the new unit, the installer may replace or reset it.
This step matters because the outdoor unit needs proper airflow around it. Crowding the unit against walls, fences, shrubs, or other obstructions can reduce efficiency and make service harder.
The technician should also check where the refrigerant lines enter the home and make sure the new system can be connected cleanly and safely.
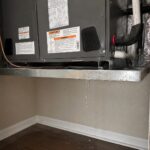
Step 7: Installing the Indoor Coil or Air Handler
The indoor part of the system is just as important as the outdoor unit. In many central AC installations, the indoor evaporator coil is replaced so it matches the new condenser.
The coil must be installed correctly, sealed properly, and connected to the ductwork so air moves through it instead of leaking around it. The condensate drain also needs to be connected so moisture from the cooling process can drain safely.
If the indoor coil or air handler is installed poorly, the system may have airflow problems, water leaks, freezing coils, or poor cooling performance.
Step 8: Running Refrigerant Lines and Electrical Connections
The refrigerant line set connects the outdoor condenser to the indoor coil. These lines must be routed, insulated, secured, and connected properly.
The technician will also complete the needed electrical connections. This may include the disconnect box, wiring to the outdoor unit, thermostat wiring, and any required control wiring.
Electrical and refrigerant work should always be performed by qualified professionals. Mistakes in this part of the job can damage equipment, create safety hazards, or void warranty coverage.
Step 9: Vacuum, Charging, and Startup
Before the system is started, the refrigerant lines need to be prepared. The technician should remove air and moisture from the system using the proper equipment.
This step is easy for homeowners to overlook because it happens behind the scenes, but it is critical. Moisture or air inside the refrigerant circuit can reduce performance and damage major components over time.
After that, the system is charged and started according to manufacturer specifications.
Step 10: Testing the New Air Conditioner
A quality air conditioning installation does not end when the equipment turns on. The technician should test the system to make sure it is cooling properly.
Testing may include:
- Checking refrigerant levels
- Measuring temperature split
- Testing airflow
- Checking static pressure
- Confirming thermostat operation
- Inspecting electrical connections
- Checking the condensate drain
- Listening for unusual vibration or noise
- Confirming the outdoor unit has proper clearance
- Reviewing system startup and shutdown
This final testing helps confirm that the system is not just running, but running correctly.
Step 11: Final Walkthrough
Before the crew leaves, they should walk you through the new system. This is your chance to ask questions and make sure you understand how to use the equipment.
The walkthrough may include:
- How to use the thermostat
- How often to change the filter
- What normal operation sounds like
- What maintenance the system needs
- Warranty information
- What to do if something does not feel right
- How to schedule routine AC maintenance
A good installer should leave the work area clean and make sure you are comfortable with the system before wrapping up.
How Long Does Air Conditioning Installation Take?
Many standard central air conditioning installations can be completed in a single day. More complicated projects may take two days or longer, especially if there are ductwork changes, electrical upgrades, tight access areas, or additional system modifications.
The best way to know is to ask your contractor before installation day. They should be able to explain the expected timeline based on your home and the scope of work.
How Much Does Air Conditioning Installation Cost?
The cost of air conditioning installation depends on the system size, efficiency level, equipment type, ductwork condition, electrical needs, access, permits, and the complexity of the job.
A basic replacement usually costs less than a project that requires new ductwork, line set replacement, electrical upgrades, or a different equipment location. Higher-efficiency systems may cost more upfront but can help reduce energy use over time.
The best estimate comes from an in-home assessment, not a one-size-fits-all price.
Questions to Ask Before AC Installation
Before moving forward, ask your HVAC contractor:
- Is the system properly sized for my home?
- Will the indoor coil or air handler be replaced?
- Will the refrigerant line set be replaced or reused?
- Does the outdoor pad need to be replaced?
- Are permits required?
- Are electrical updates needed?
- Will the ductwork be inspected?
- What warranty comes with the equipment?
- What labor warranty is included?
- What maintenance is recommended after installation?
These questions can help you compare contractors and avoid surprises.
Signs It May Be Time to Replace Your Air Conditioner
Air conditioning installation may be worth considering if:
- Your AC is 10 to 15 years old or older
- Repairs are becoming frequent
- The system struggles to cool your home
- Some rooms are much hotter than others
- Energy bills keep rising
- The system uses outdated refrigerant
- The outdoor unit is loud or unreliable
- The AC runs constantly but does not keep up
- The cost of repair is getting close to the cost of replacement
Not every AC problem means you need a new system, but if your current unit is aging and unreliable, replacement may be the better long-term option.
Professional AC Installation Helps Protect Your Investment
A new air conditioner is a major investment. The equipment matters, but the installation matters just as much. Proper sizing, clean refrigerant work, sealed connections, safe electrical work, good airflow, and final testing all affect how the system performs.
If you are planning to replace your air conditioner, choose a contractor who takes the time to inspect your home, explain your options, install the system carefully, and verify performance before leaving.
Schedule Air Conditioning Installation
If your current AC system is old, unreliable, or struggling to keep your home comfortable, professional air conditioning installation can help restore dependable cooling and improve long-term comfort.
Contact Derek Sawyer to schedule an air conditioning installation estimate and find the right cooling system for your home.
Frequently Asked Questions
Is air conditioning installation a DIY project?
Whole-home central air conditioning installation should be handled by a licensed HVAC professional. It involves refrigerant handling, electrical work, system sizing, airflow, code requirements, and manufacturer specifications.
How long does air conditioning installation usually take?
Many standard AC replacements can be completed in one day. More complex installations may take two days or longer if ductwork, electrical work, or equipment relocation is needed.
Do I need a permit for air conditioning installation?
Permit requirements vary by location. In many areas, central AC installation or replacement requires a permit and inspection. Your HVAC contractor should explain what is required for your project.
What size air conditioner do I need?
The right size depends on your home’s square footage, insulation, windows, layout, ductwork, climate, and cooling needs. A professional load calculation is the best way to size the system correctly.
Does a new AC installation include a new thermostat?
It depends on the estimate and equipment package. Some installations include a new thermostat, while others reuse the existing thermostat if it is compatible and working properly.
Should the refrigerant lines be replaced during AC installation?
If the line set is accessible, replacement is often recommended. If it must be reused because it is hidden in walls, ceilings, or concrete, it should be properly inspected, flushed when needed, pressure tested, and verified for compatibility.
How do I prepare for AC installation day?
Clear access to the indoor equipment, outdoor unit, thermostat, electrical panel, attic, closet, crawl space, or other work areas. Keep pets and children away from the workspace and ask the installer what else is needed before the crew arrives.
What happens after the new air conditioner is installed?
The technician should test the system, verify cooling performance, check refrigerant and airflow, review thermostat operation, explain maintenance requirements, and answer your questions before leaving.